To set up your domain with GoDaddy Connect
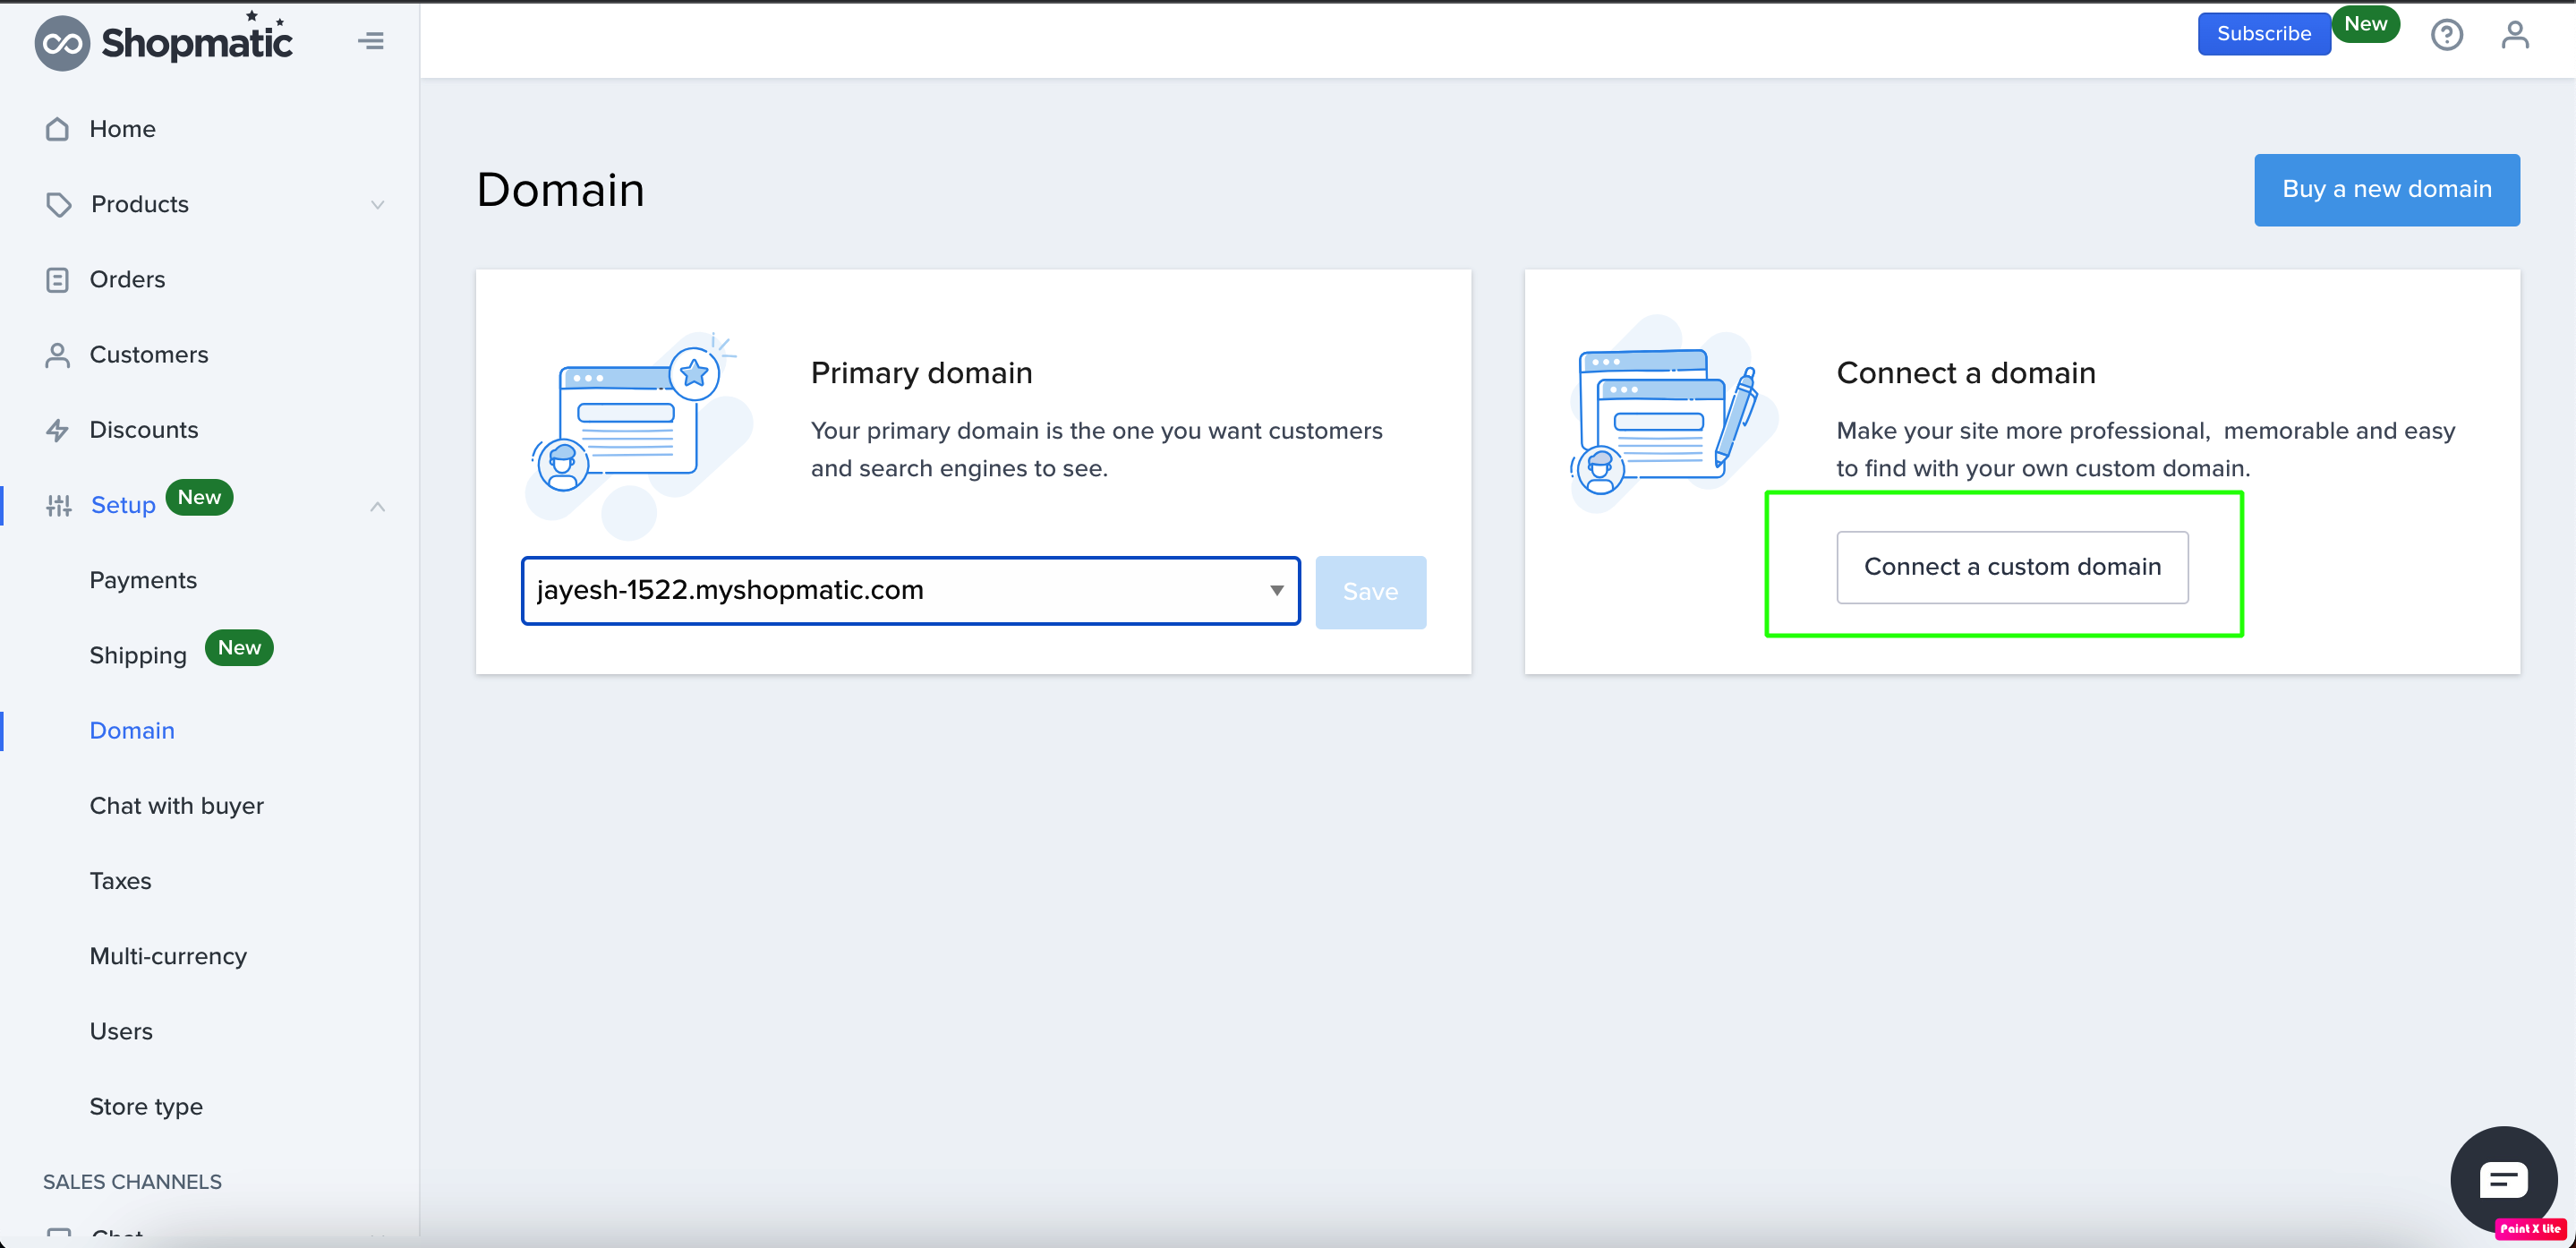
1. Login to your Shopmatic account, from the top-left corner, click on the dashboard menu, next click on Setup and then on Domain
2. Click on “Connect a custom domain”
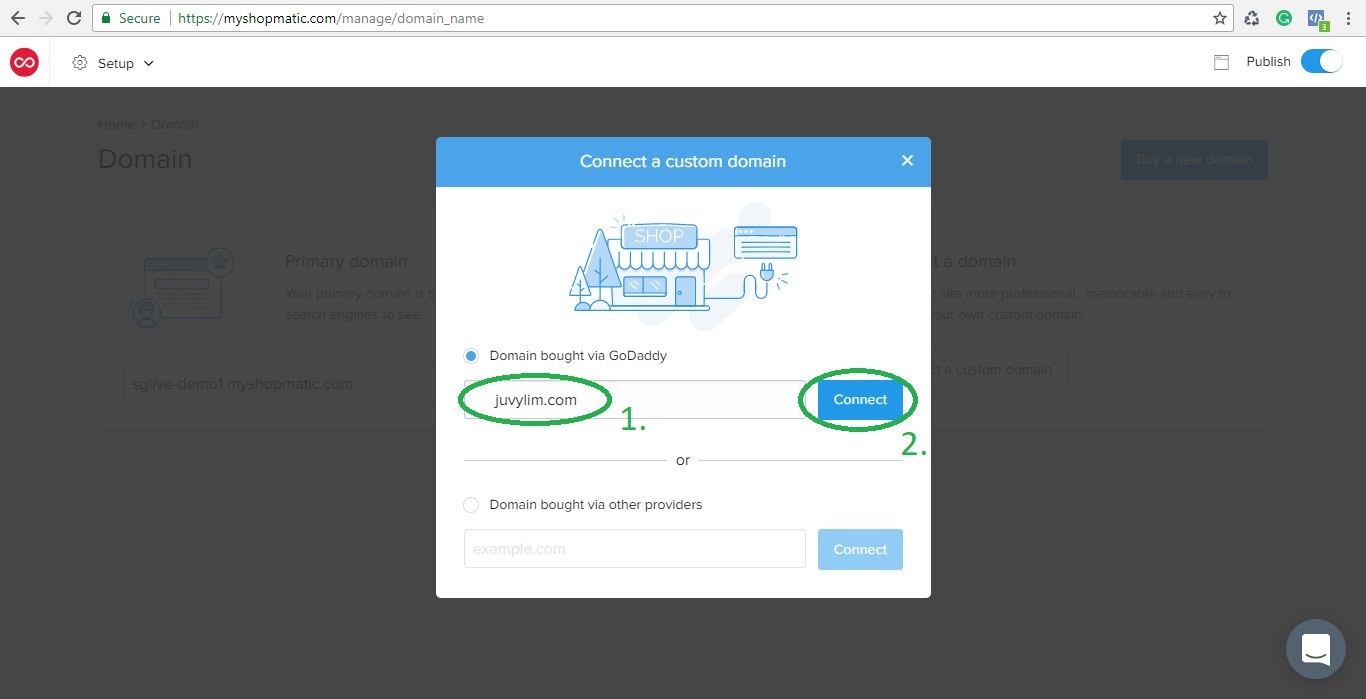
3. Enter your root domain name in the first field (root domain name does not have “www.”), and then click on “Connect”
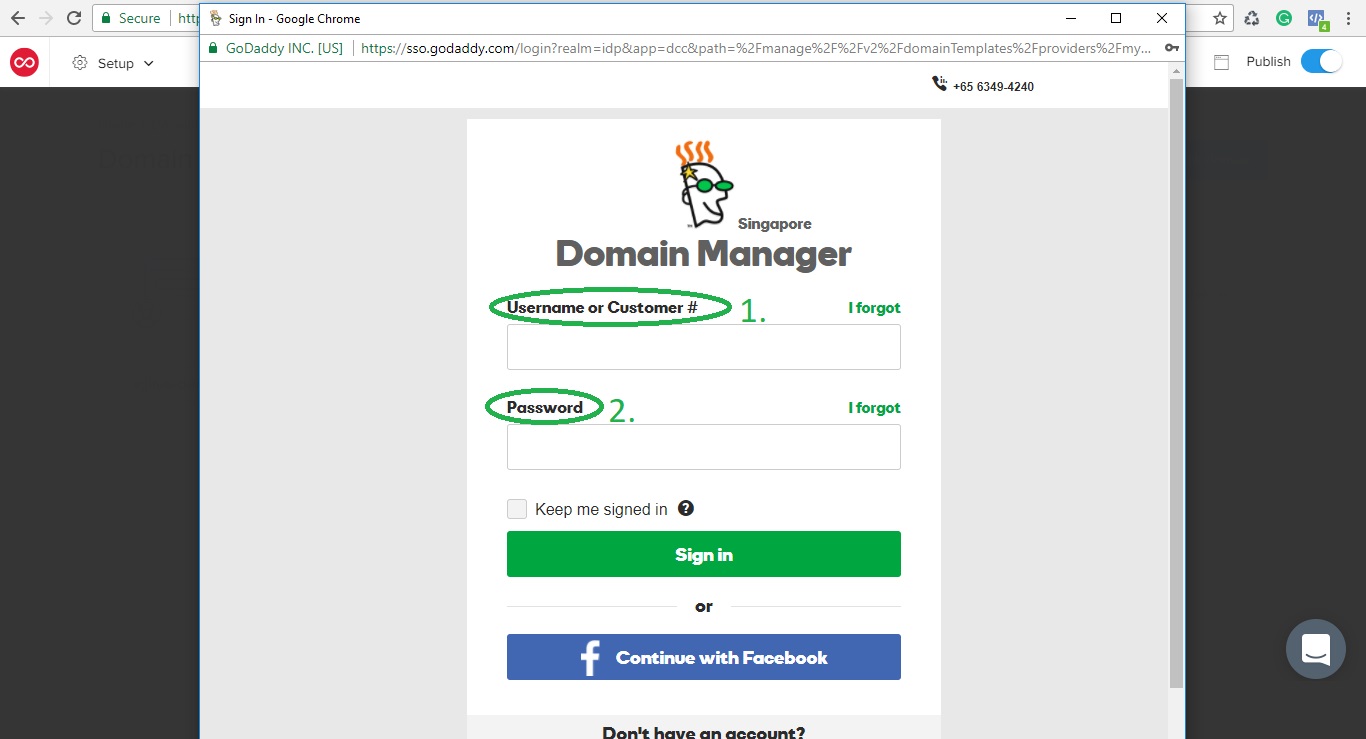
4. A new GoDaddy pop-out window will appear, enter your username/customer# and password, and click on “Sign in”
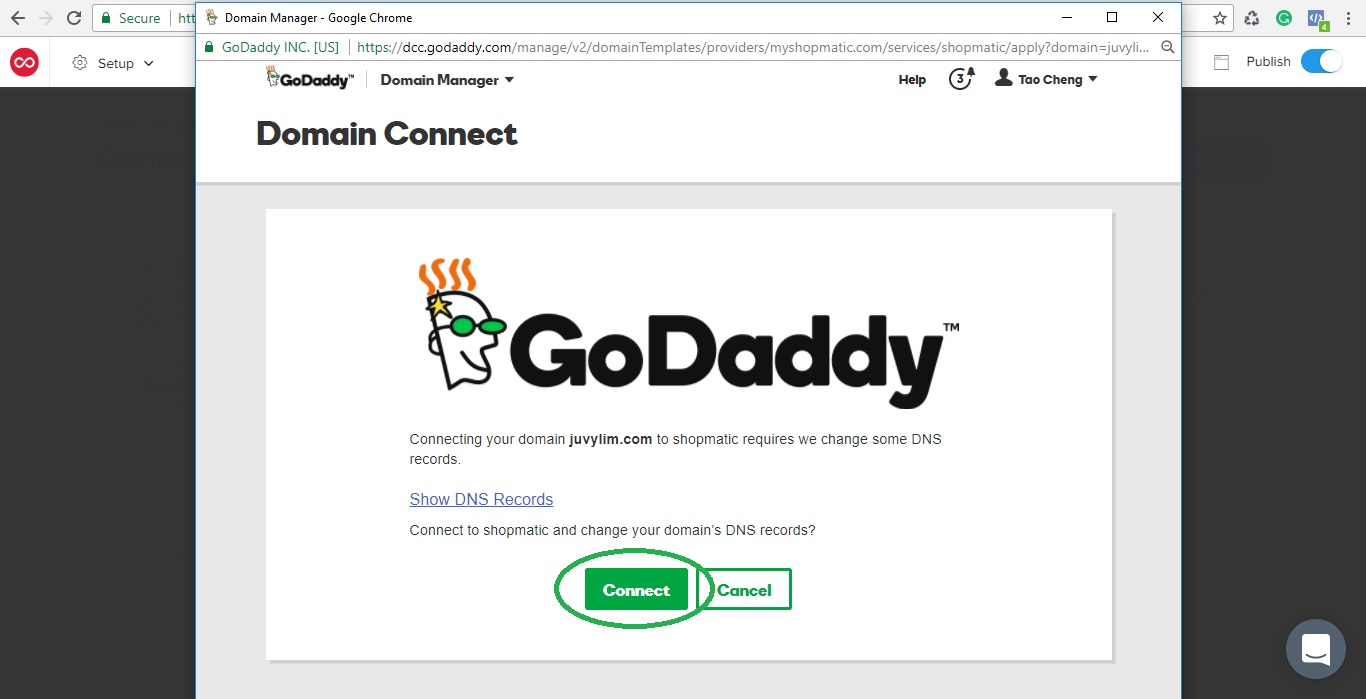
5. Another new page will load, simply click on “Connect”
6. Success! We can now close this window and proceed back to the Shopmatic platform
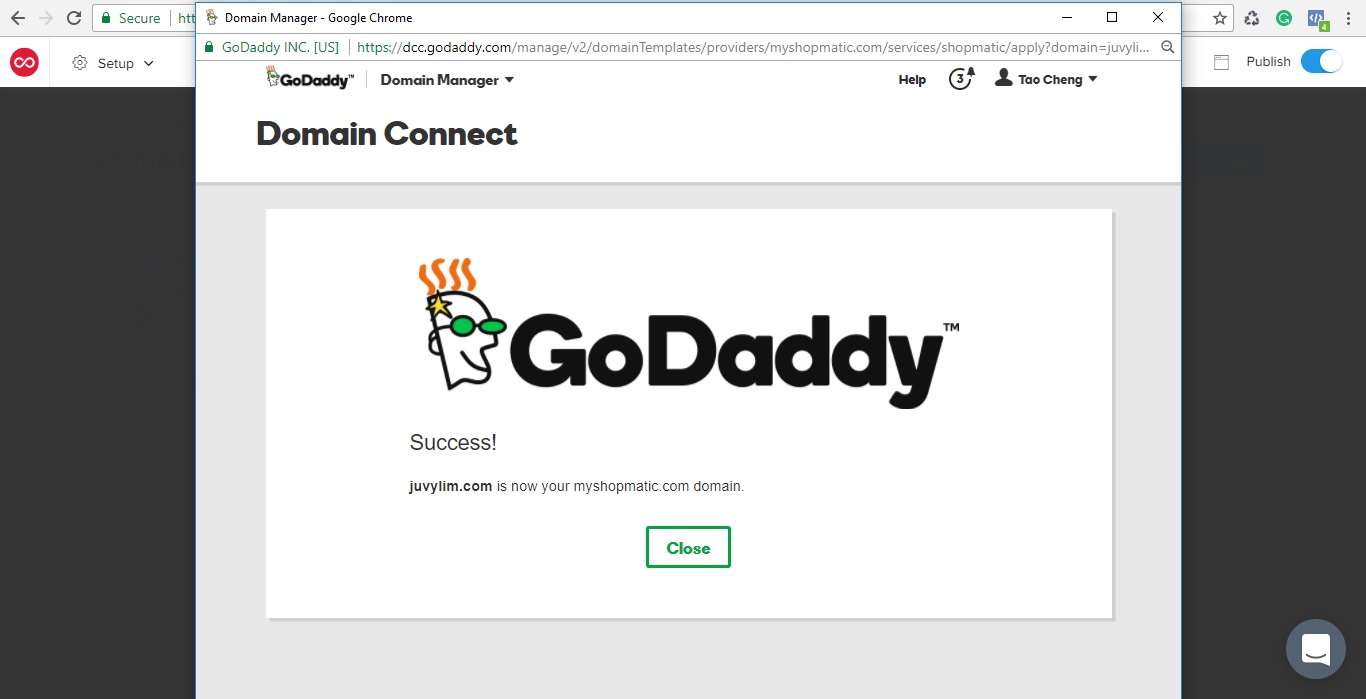
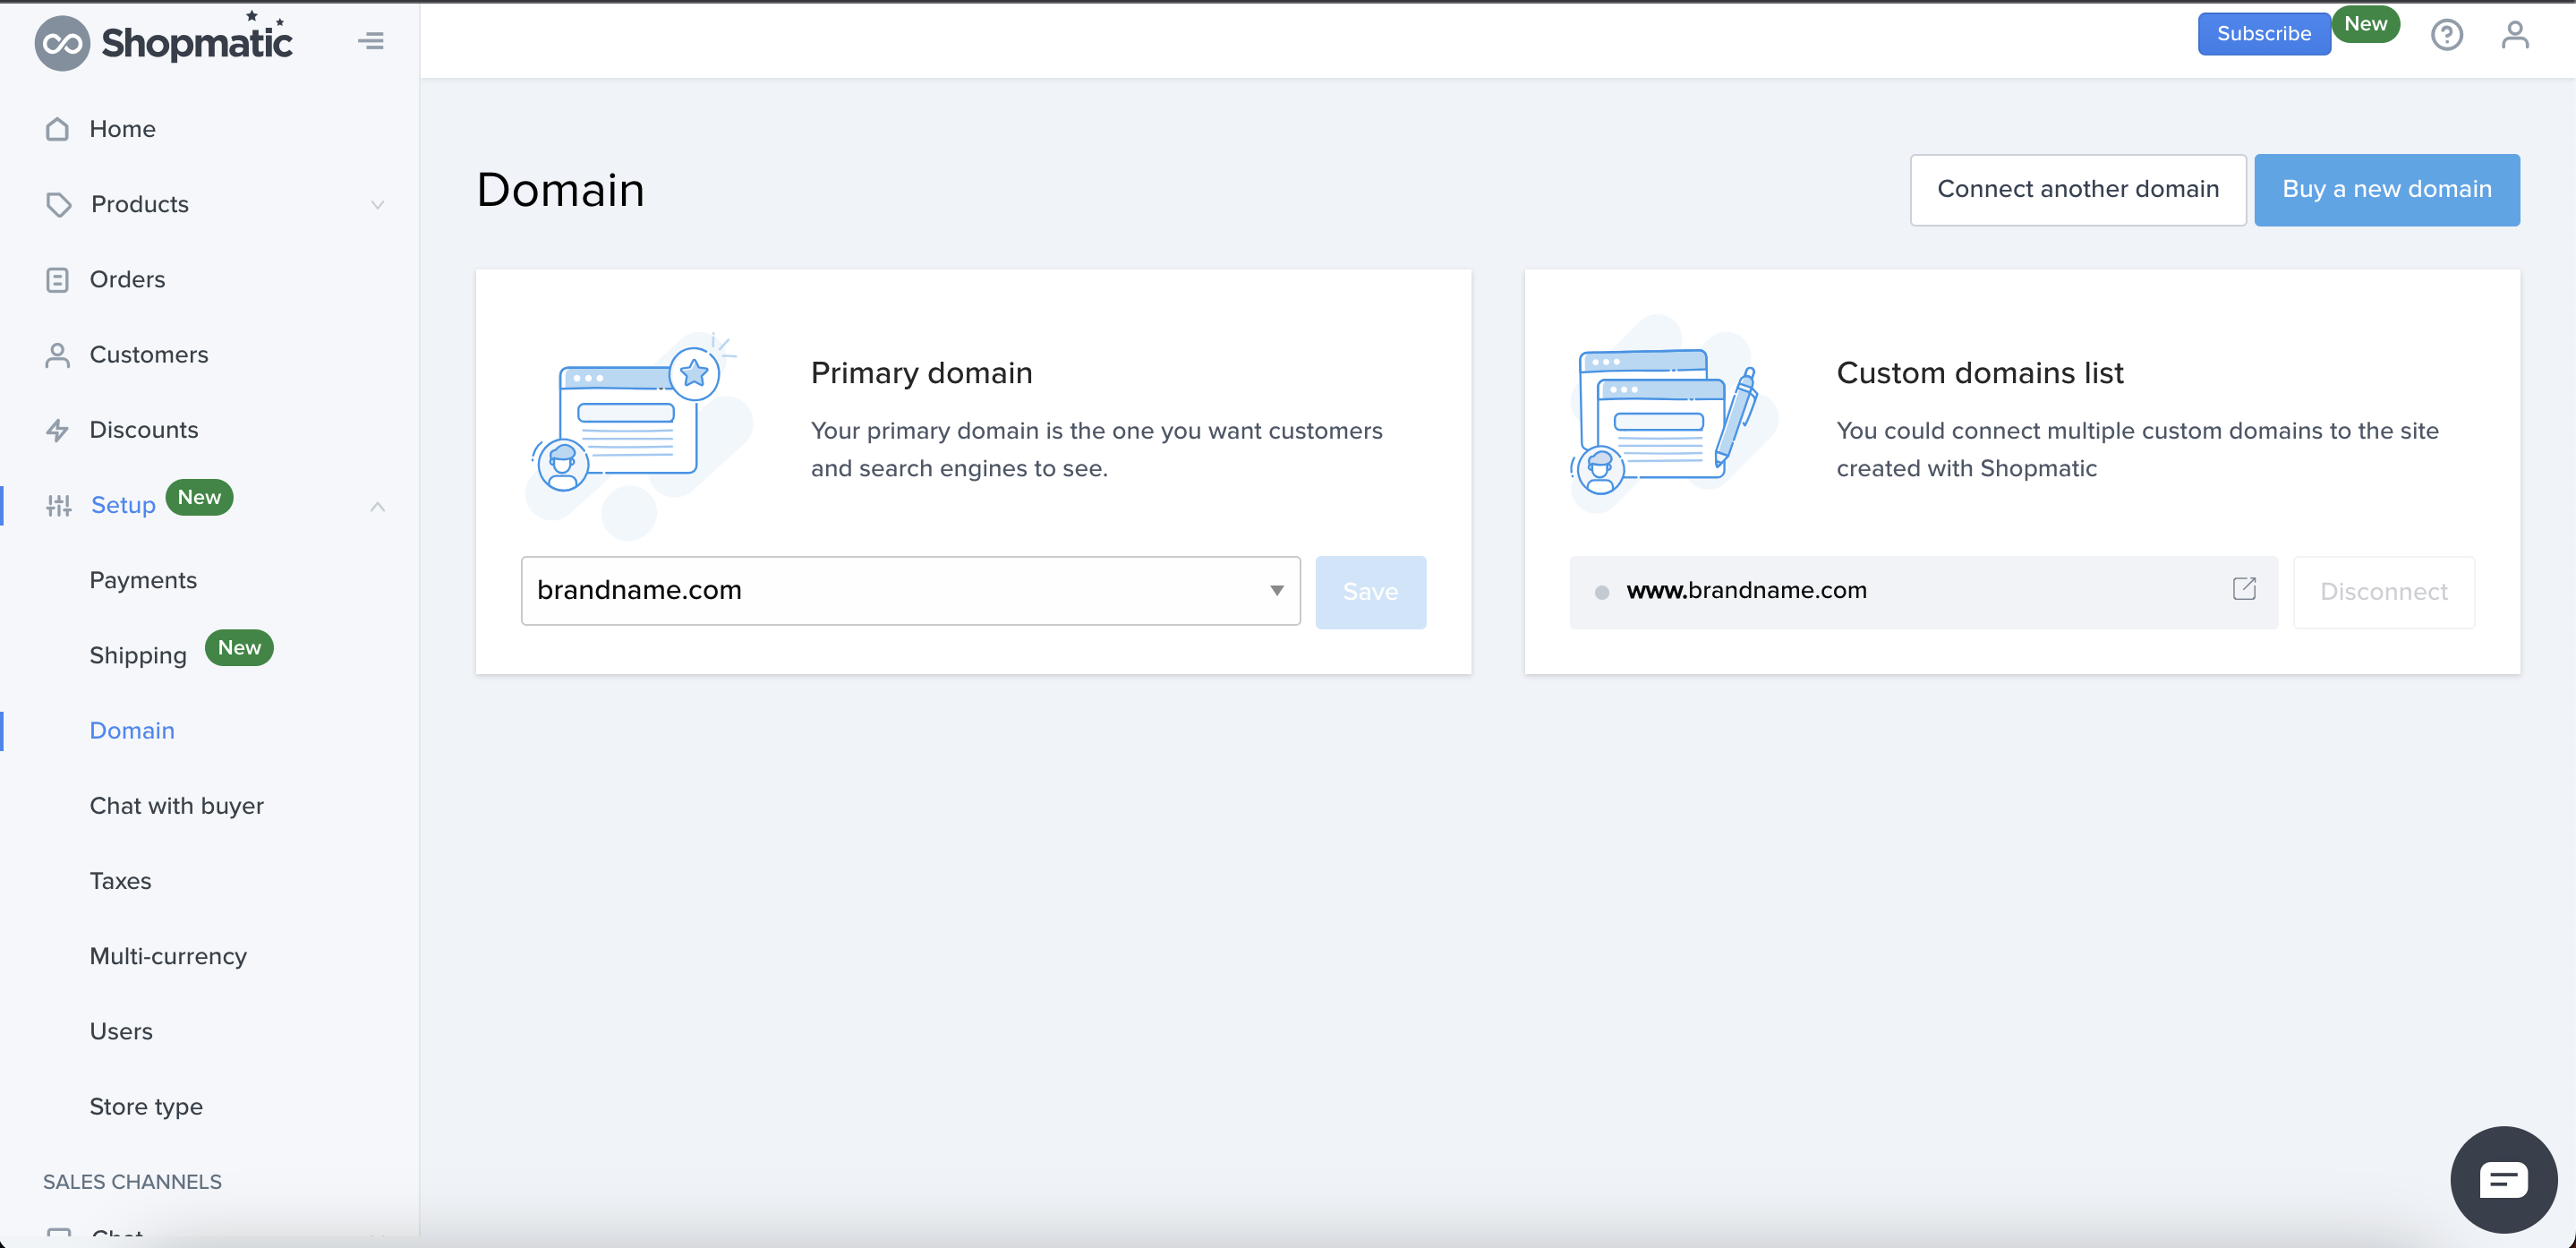
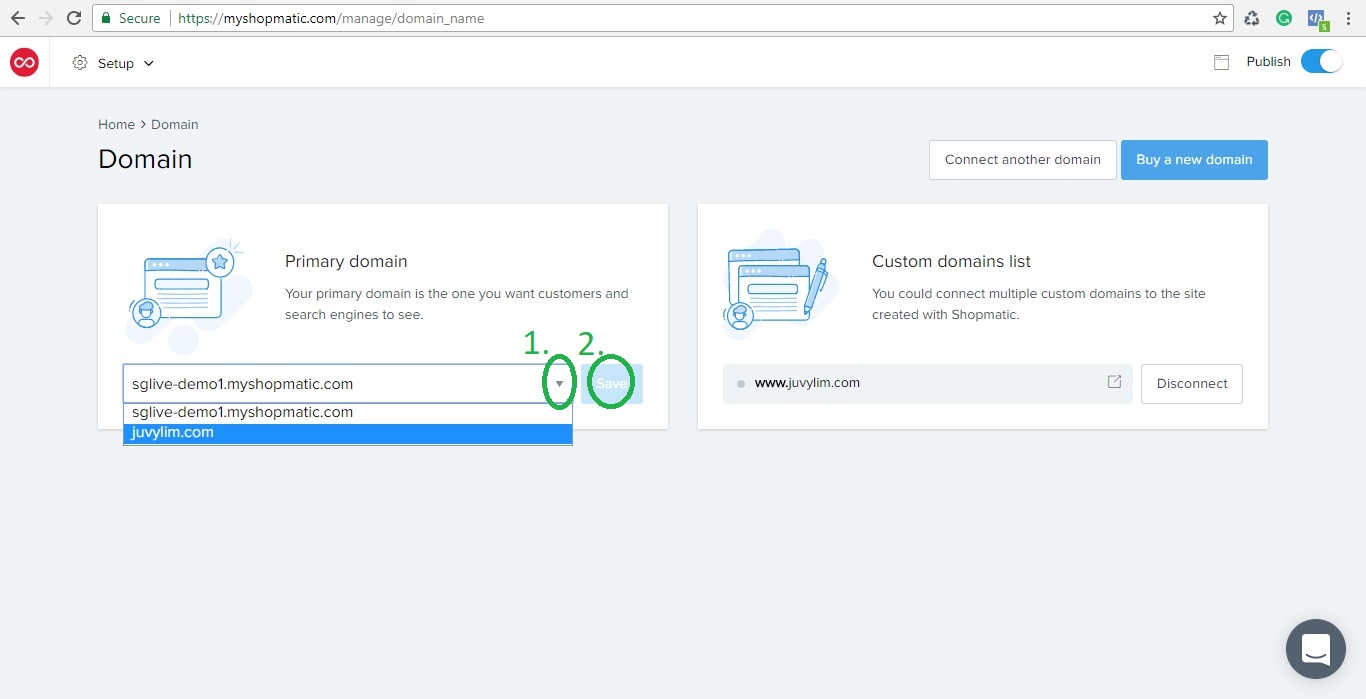
7. On the Shopmatic platform, click on “Go to Domain settings”
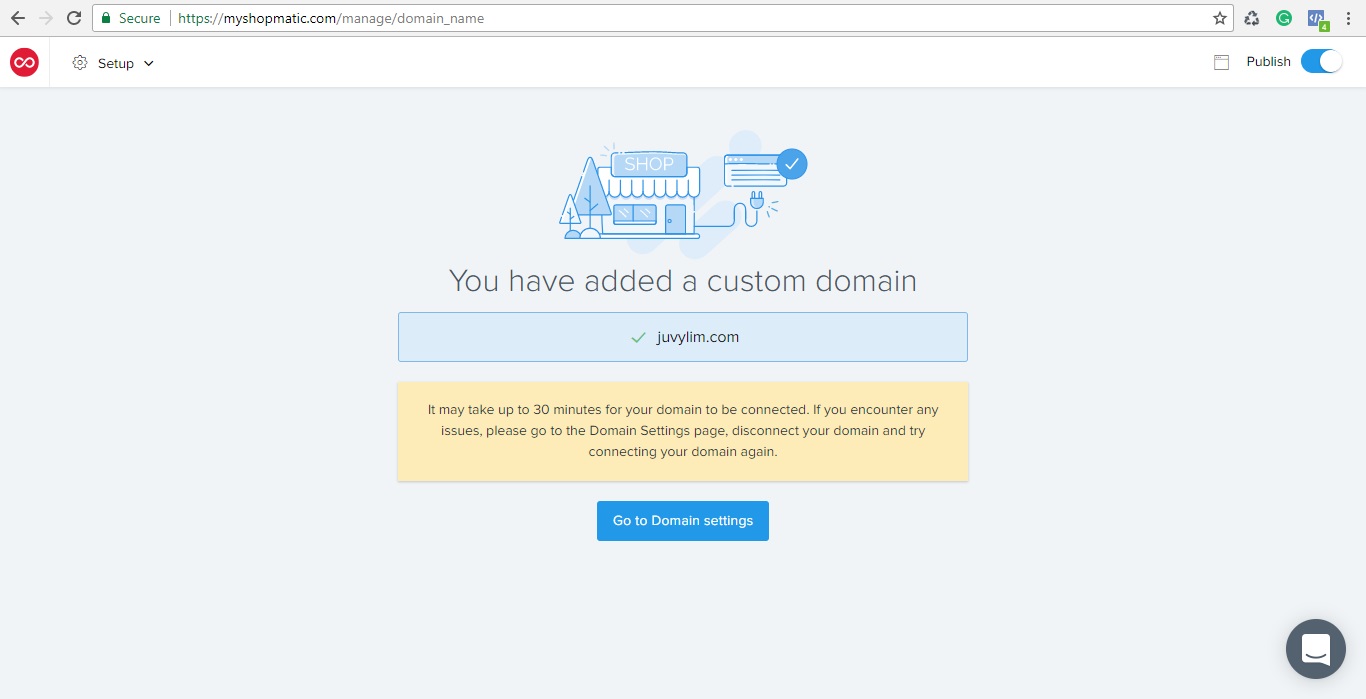
8. Choose the custom domain name that you have just connected as your Primary domain and click on Save
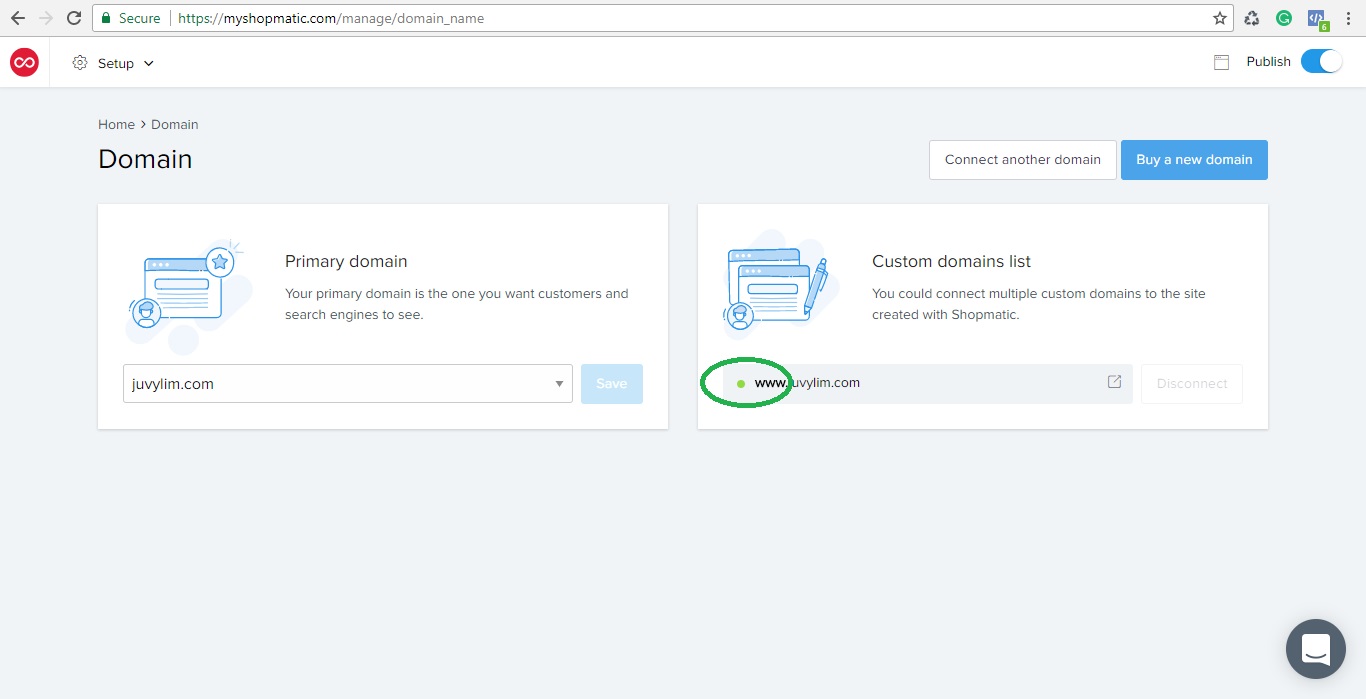
9. Once the domain name has been successfully connected, the live connection indicator will turn green!
(Optional Steps) Add a forwarding from your root domain to your subdomain, so that customers can visit your site with or without typing “www.”
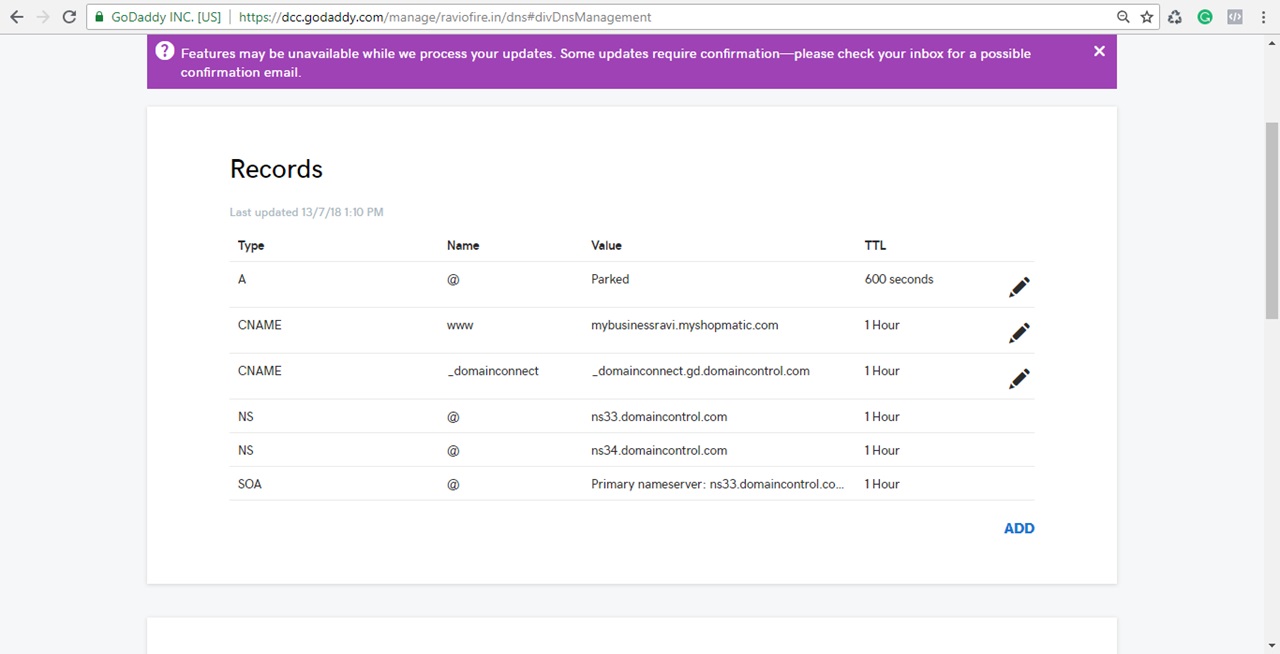
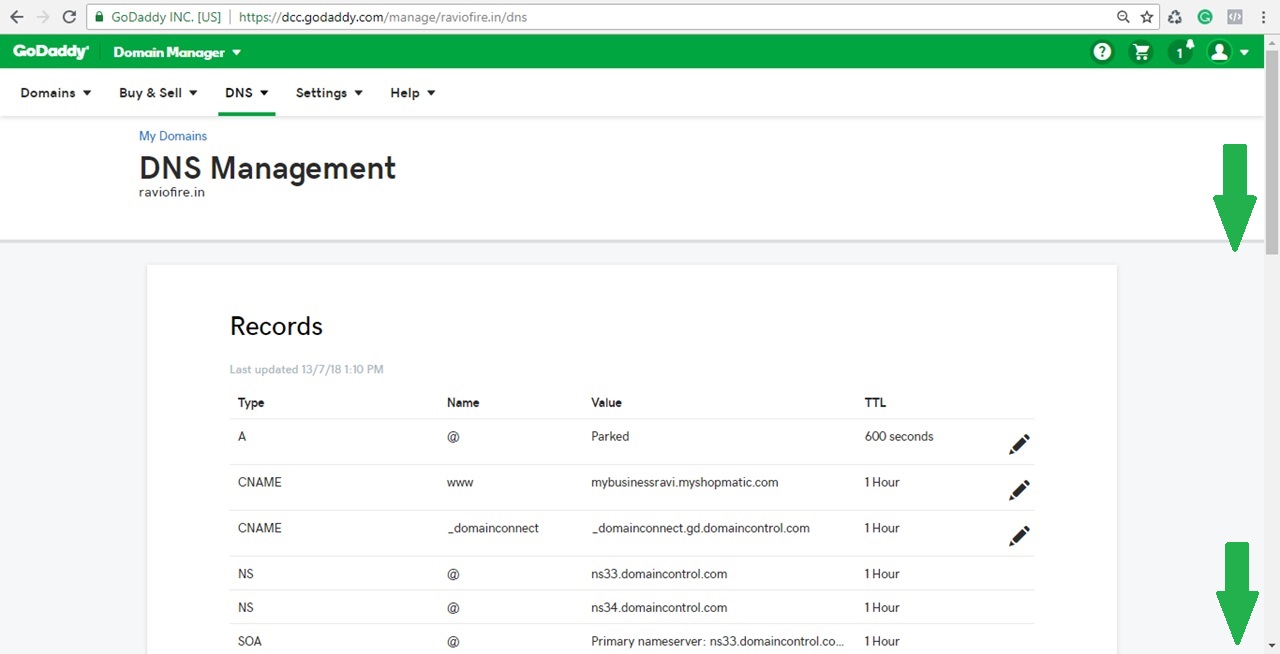
1. From your DNS Management, scroll down the page till you see “Forwarding”
2. Under “Forwarding” click on “ADD” for Domain
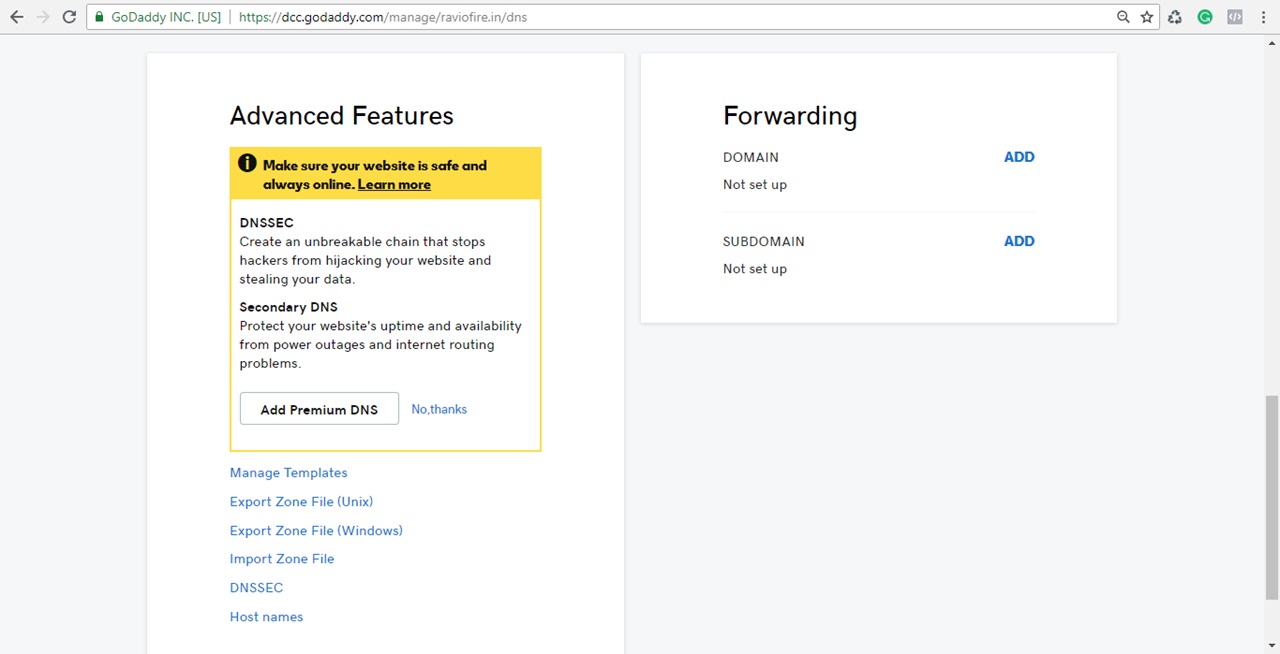
3. Please follow these settings:
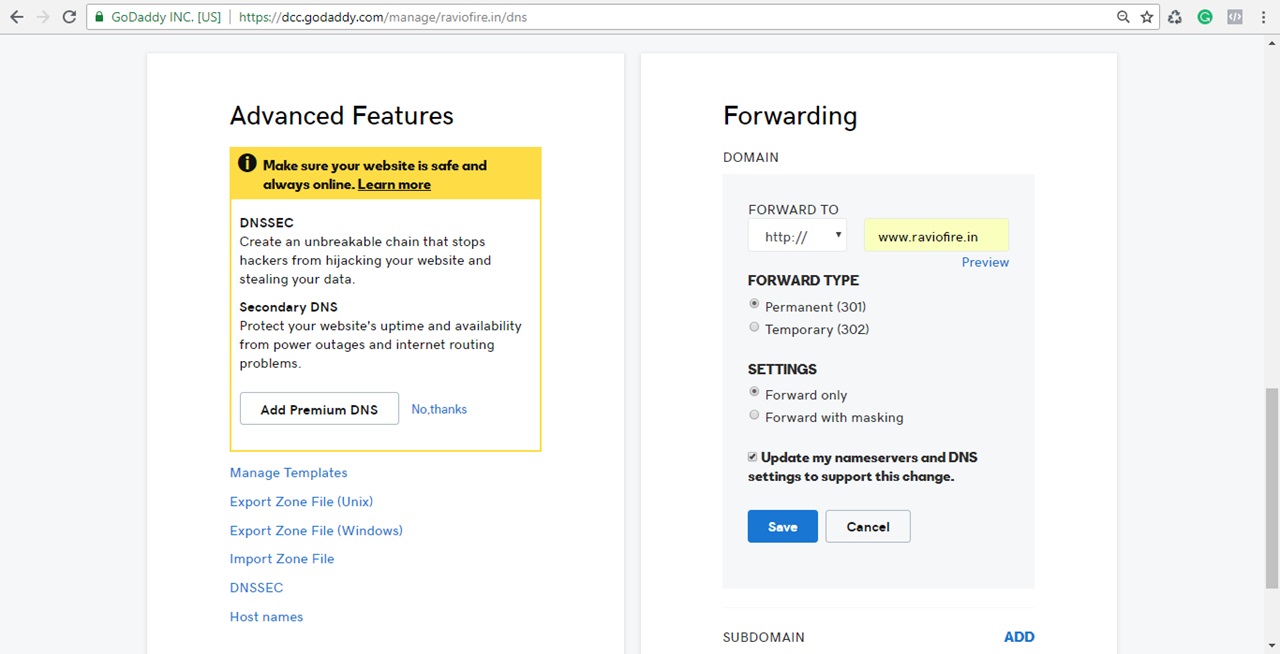
i. Forward to: http:// (do not use https://) to your sub-domain name (e.g. www.raviofire.in)
ii. Forward type: Permanent (301)
iii. Settings: Forward only
iv: (Click on) Update my nameservers and DNS settings to support this change
v: Click on Save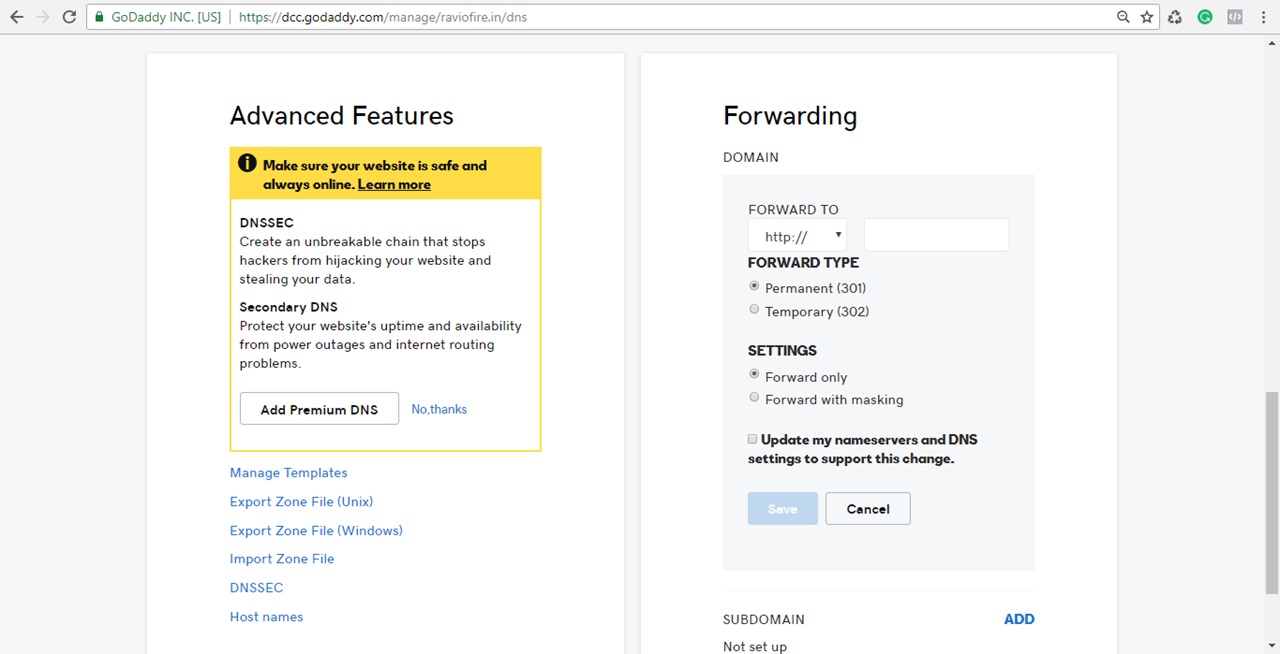
4. Here is the example:
5. After clicking on “Save”, you will see this page, kindly allow GoDaddy a few hours for the update to be applied.