1. Please go to http://www.resellerclub.com/ and select ‘MyAccount’, followed by ‘Customer Login’.

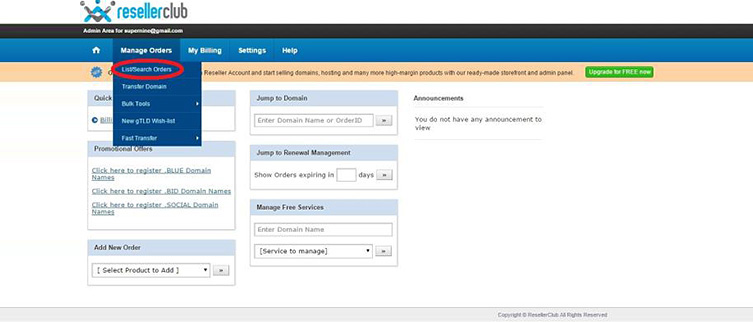
2. On the navigation bar, please select ‘Manage Orders’, followed by ‘List / Search Orders’.
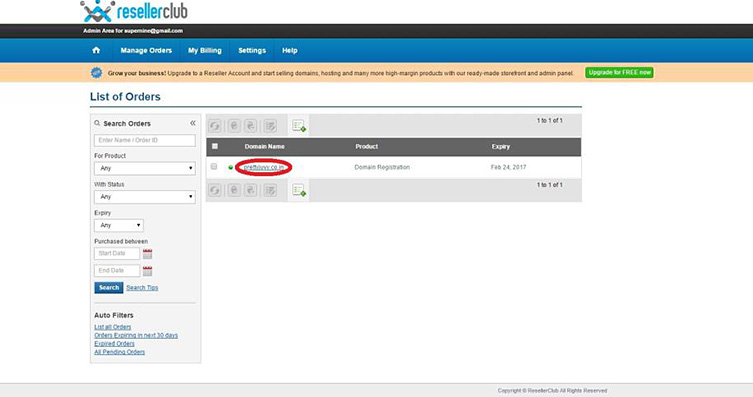
3. Please select the chosen domain name to be edited.
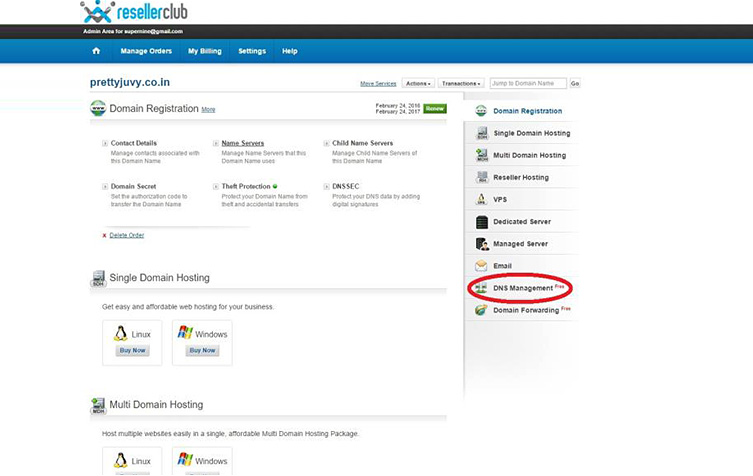
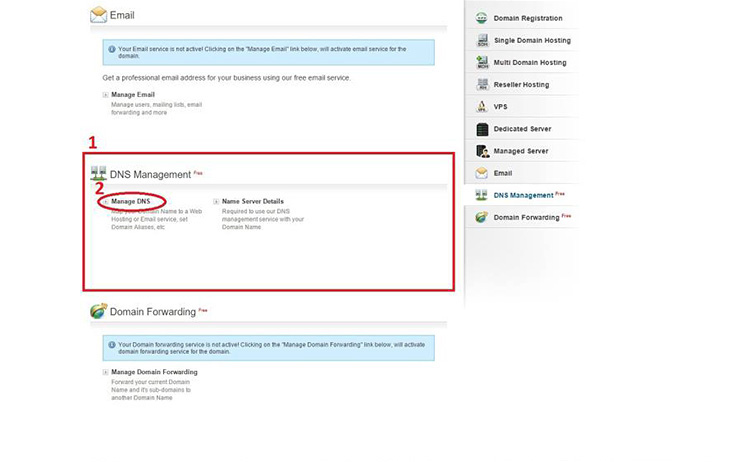
4. On the side bar, please select DNS Management. The page will scroll to the selected section. Please select ‘Manage DNS’.
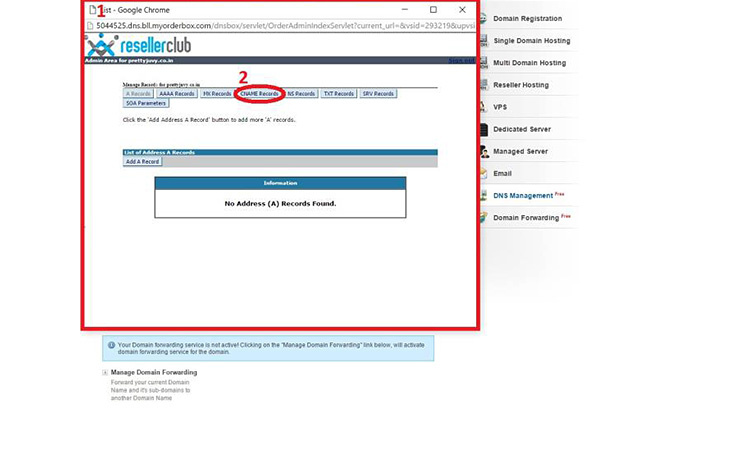
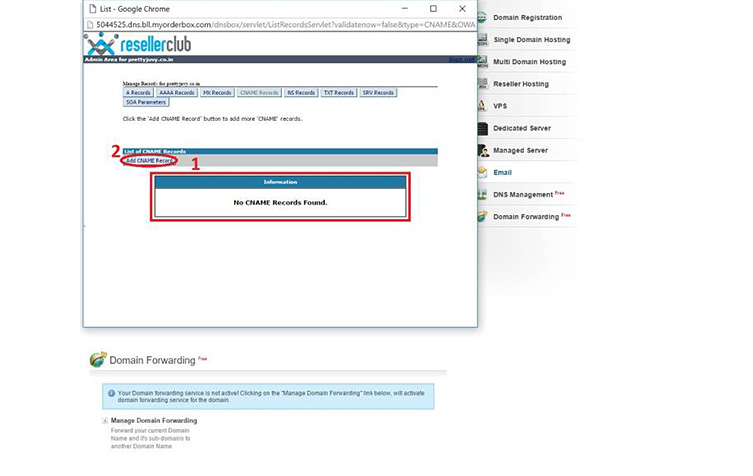
5. Upon a page popup, please select ‘CNAME Records’, followed by the ‘Add CNAME Record’ as shown.
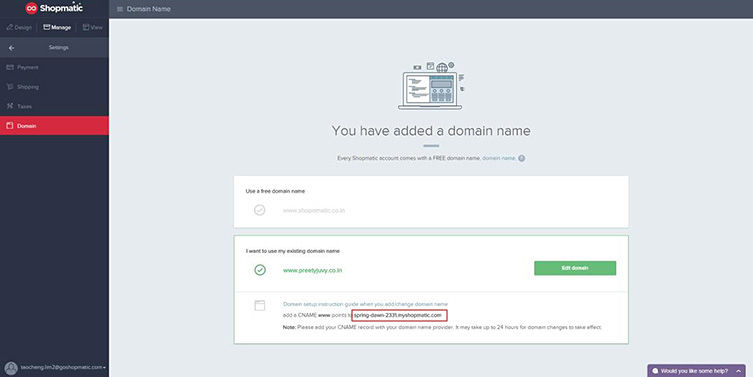
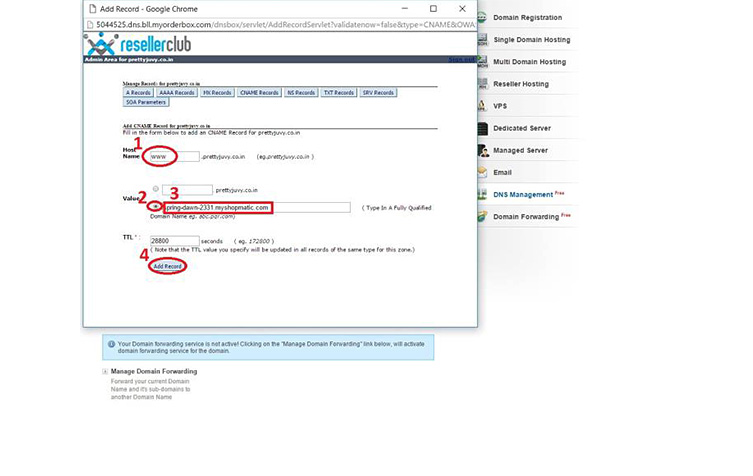
6. Head back to the Shopmatic platform, and make a copy of the Shopmatic CNAME (e.g. spring-dawn-2331.myshopmatic.com), as it will be needed for the next step.
7. On the ‘Add CNAME Record’ page, please input ‘www’ under the host name, and have the copied Shopmatic CNAME pasted under the 2nd option as shown. Please click the ‘Save Changes’ button to proceed.
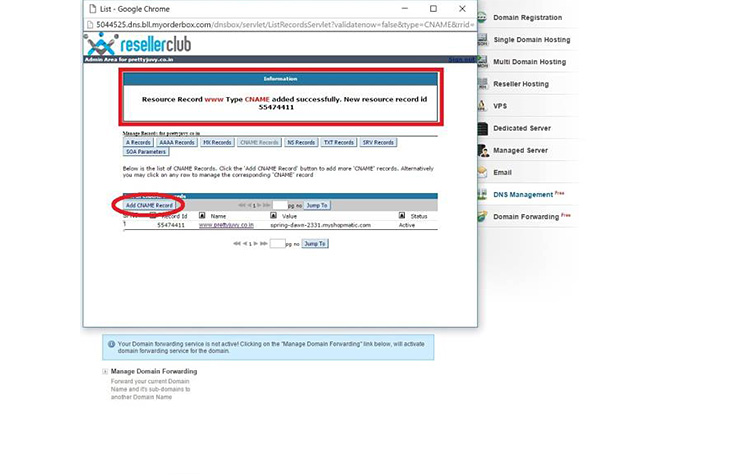
8. Upon added successfully, please select ‘Add CNAME Record’ again.
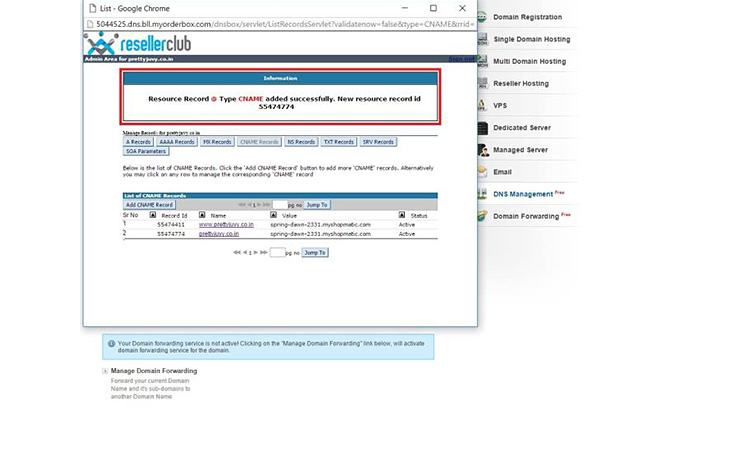
9. This time, only the Shopmatic CNAME would have to be keyed in. Please select the 2nd option, have the copied Shopmatic CNAME pasted in the input field. Please select ‘Add Record’ to proceed.
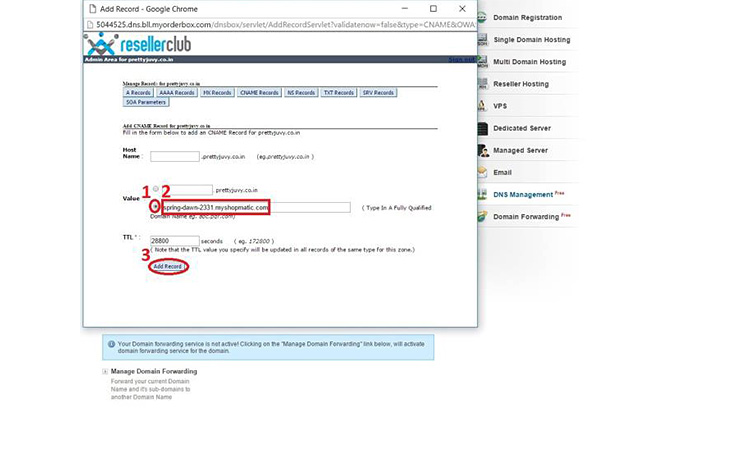
10. After it is successfully added, please allow up to 48 hours for changes to take effect.
